

Wire Window Boxes DIY
I don’t love spring, or summer. If my husband would agree to move somewhere with perpetual fall/winter weather, I’m in. But he won’t. So gardening has become my lemonade from lemons.
Pinterest is a feast for the eyes when it comes to garden inspiration, much like everything else really. I find myself drawn to old English style gardens with their boxwoods and formality. One trend that kept cropping up in my searches was ironwork window boxes. They were boxy, often with ornate open iron scrollwork revealing potted boxwoods or other plants within their cages. I adore their simple beauty.
But, try to find one in real life. I’ve looked high and low and high again. The closest I found were at an antiques market, and I have no idea if they were actually intended as window boxes. They were lovely but pricey, heavy, and no where near the dimensions of my windows. So game on, challenge accepted, DIY it was.
The first thing that came to mind were wire storage baskets. I’ve seen them everywhere, I even have several in my own house storing anything from blankets in my linen closet to snacks in my pantry. Surely I could find storage baskets that would work. I knew I could likely track down the right shape, and figured I could worry about size later. Quantity needed, however, would probably be a challenge. I had six windows that wrap a dining room where I wanted to place the boxes. Figuring this would be my greatest obstacle, I chose to look in stores that I knew kept heavy stock of items rather than just one or two of something.
I found the baskets I used for this project at the At Home store. I spotted them from across several aisles, on an end cap, en masse. Intended as pantry storage baskets, a safe assumption based on the fact that they included a cotton liner bearing the word ‘Pantry’ across the front, {…why is it that we need to label everything, btw, retailers please stop…} they screamed of ironwork window box perfection in my humble opinion.
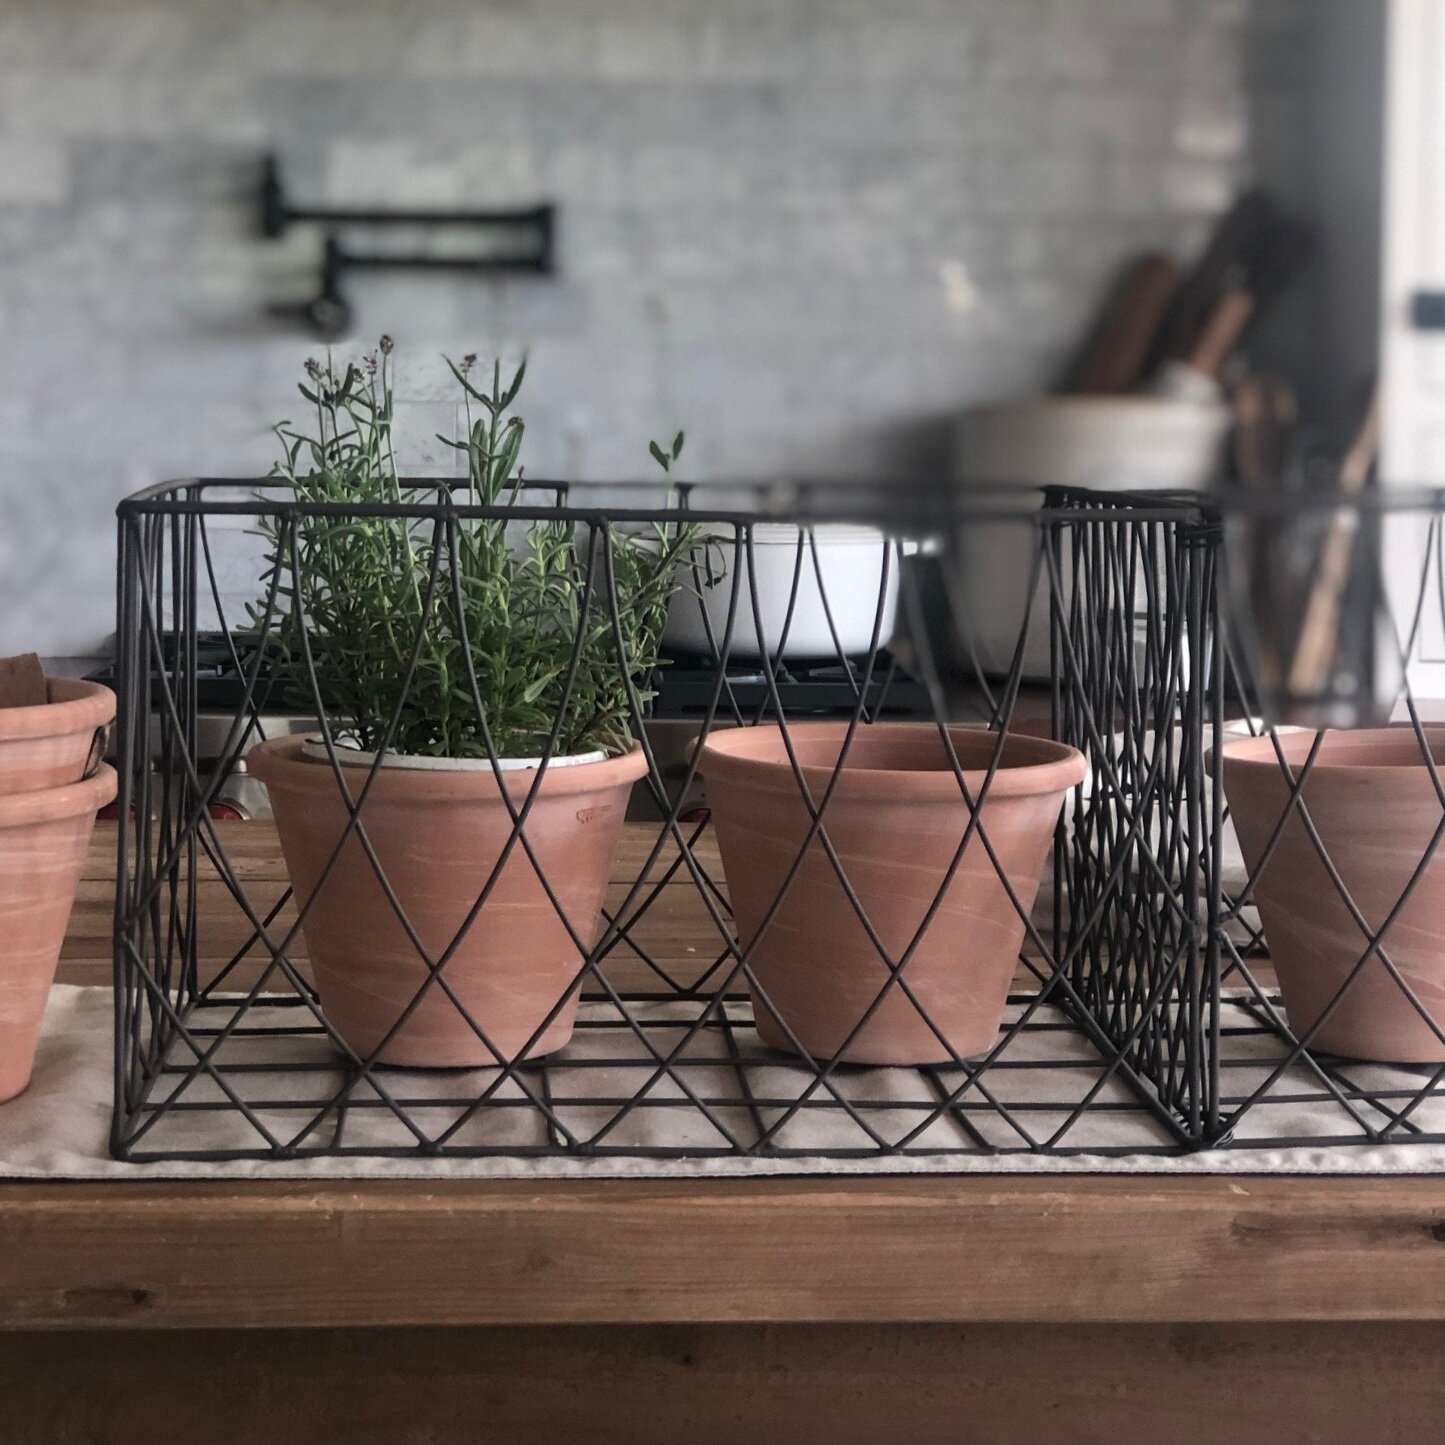
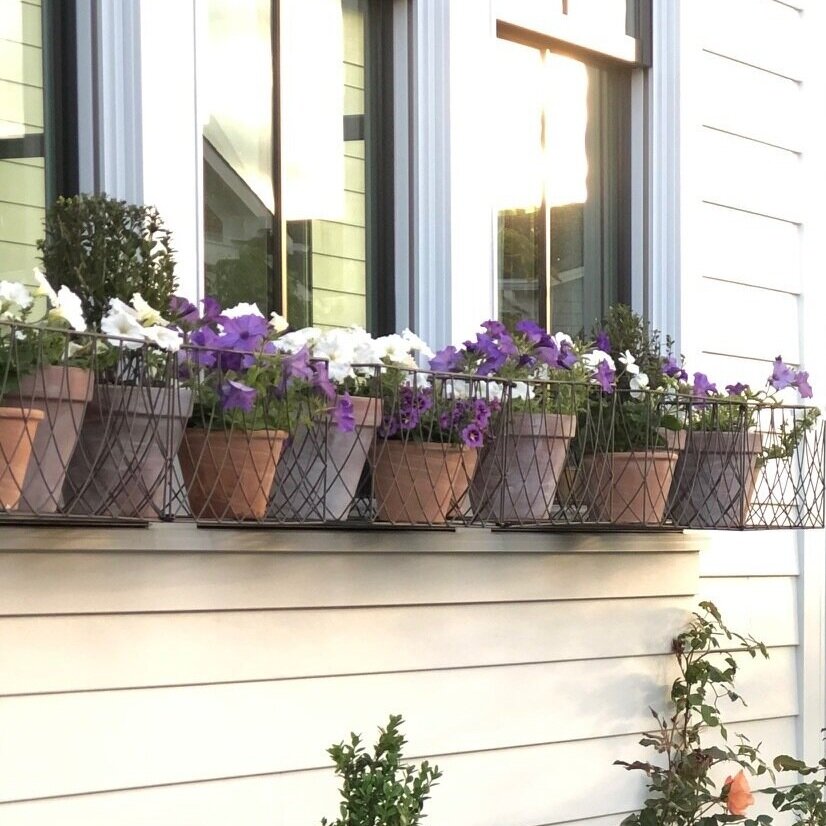
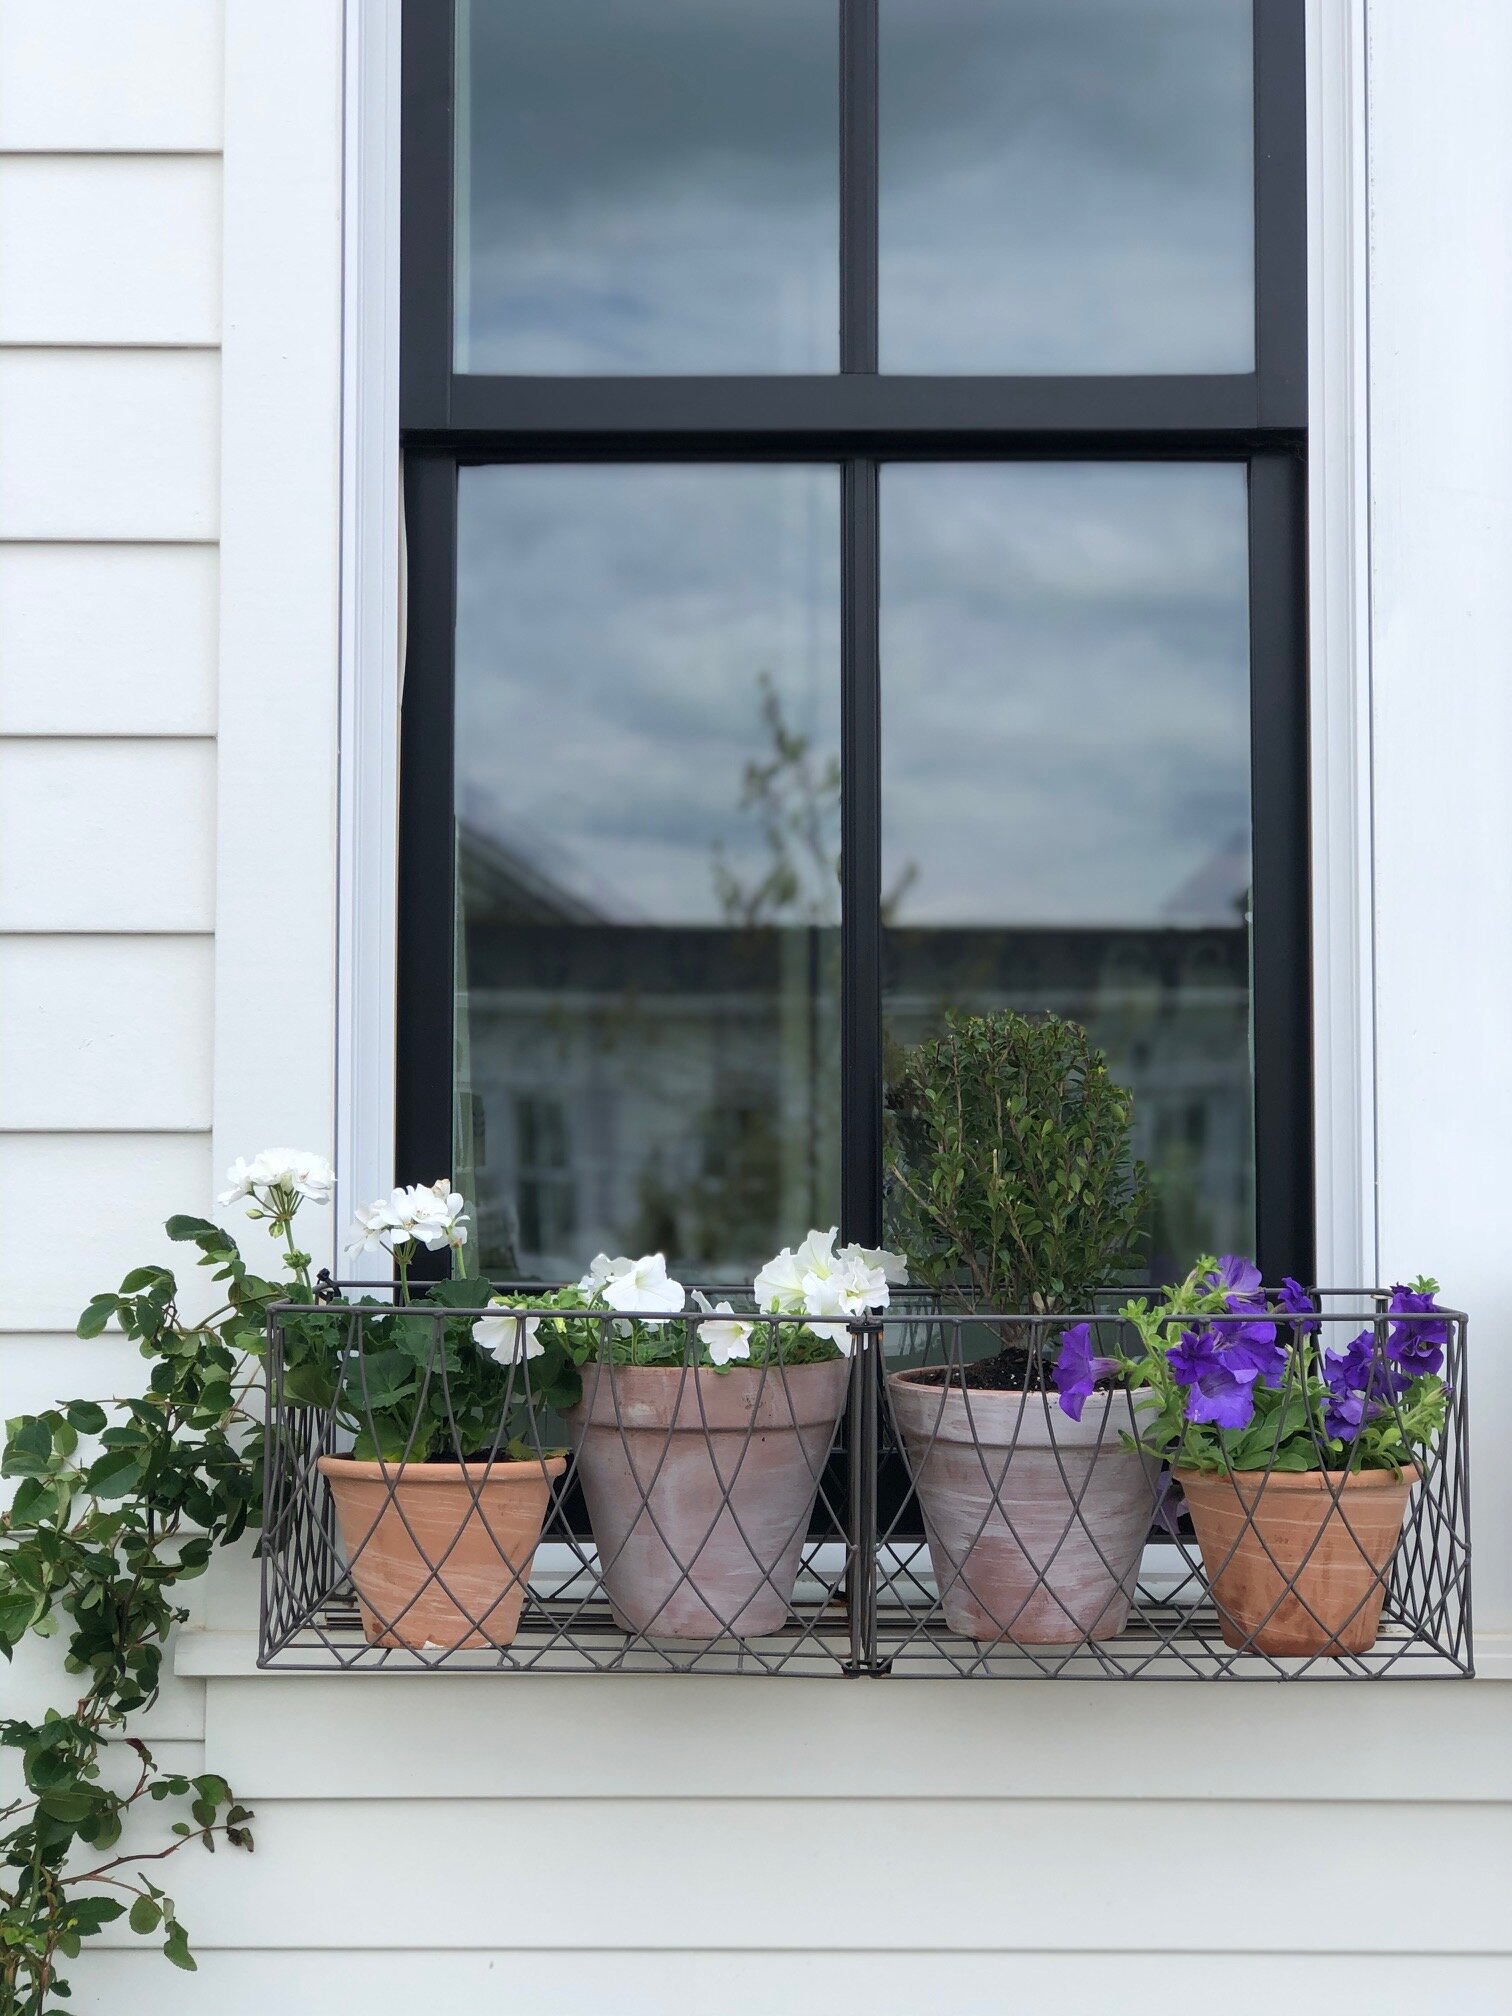
Good news, they were sturdy enough that I was sure they could support a flower pot or two. Better news, they were a downright bargain compared to the antique market boxes. Best news, they came in various sizes and it wasn’t hard to imagine configuring them somehow to fit my windows. I chose the medium size baskets and determined that if I could attach two of them together end to end, they would span just to the outside of my windows. Lucky for me, they had the twelve medium baskets I would need for my six windows.
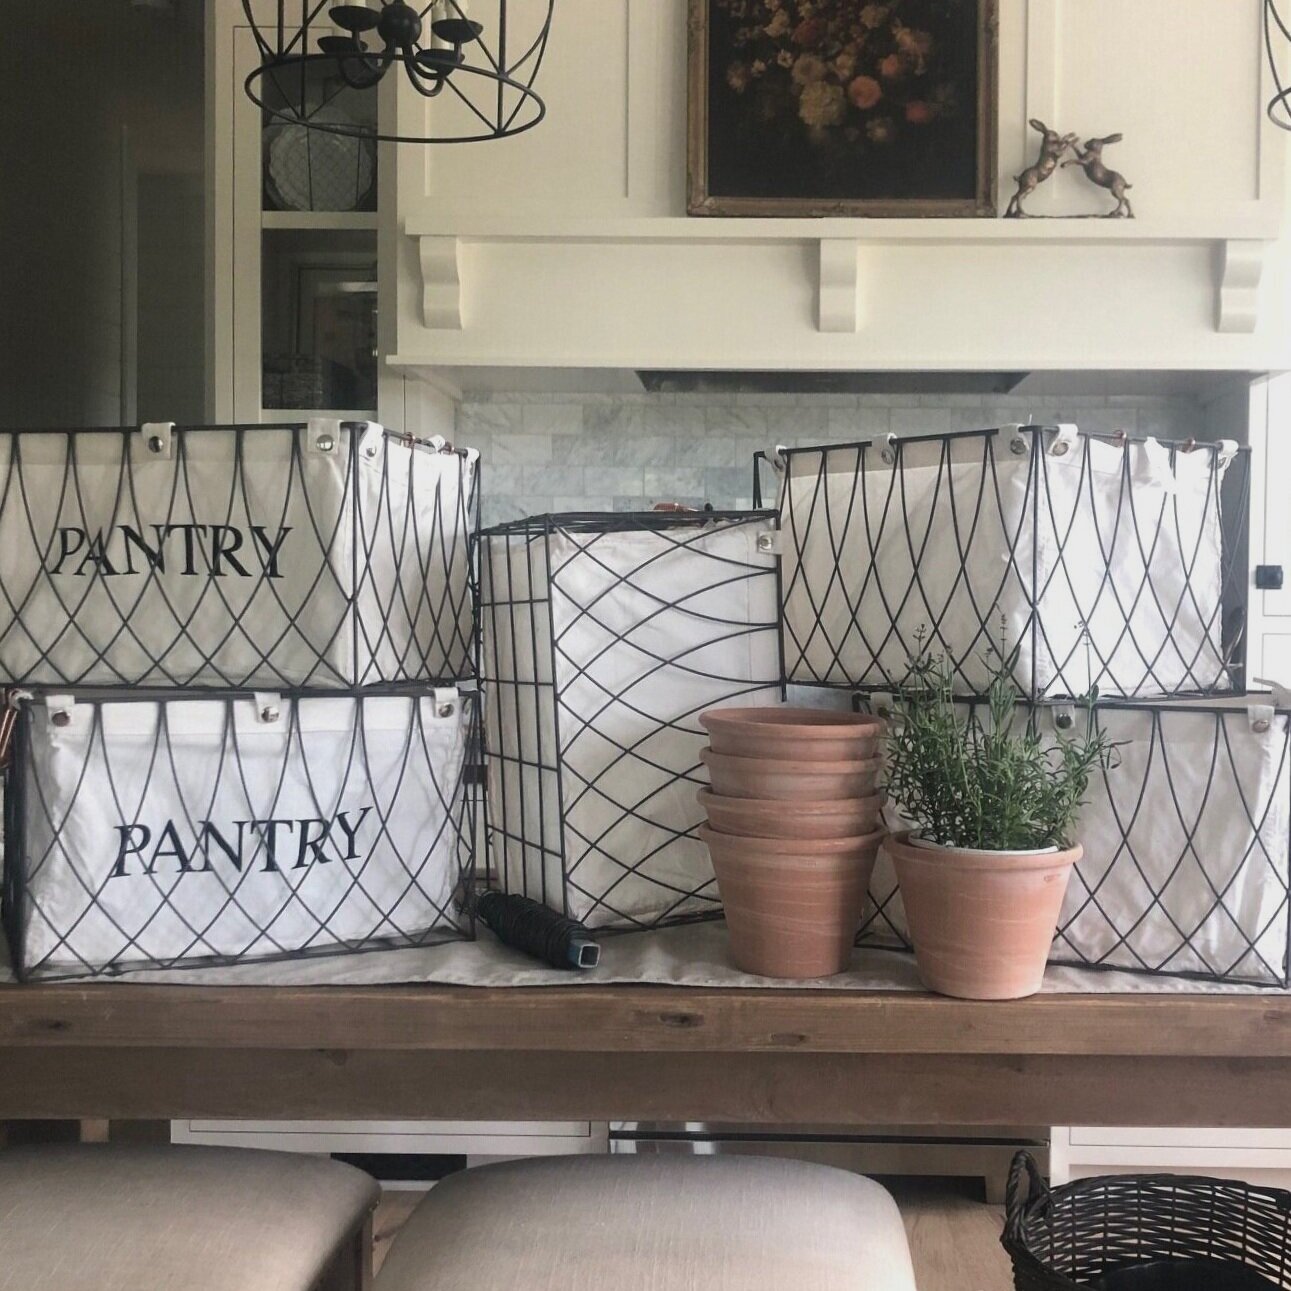
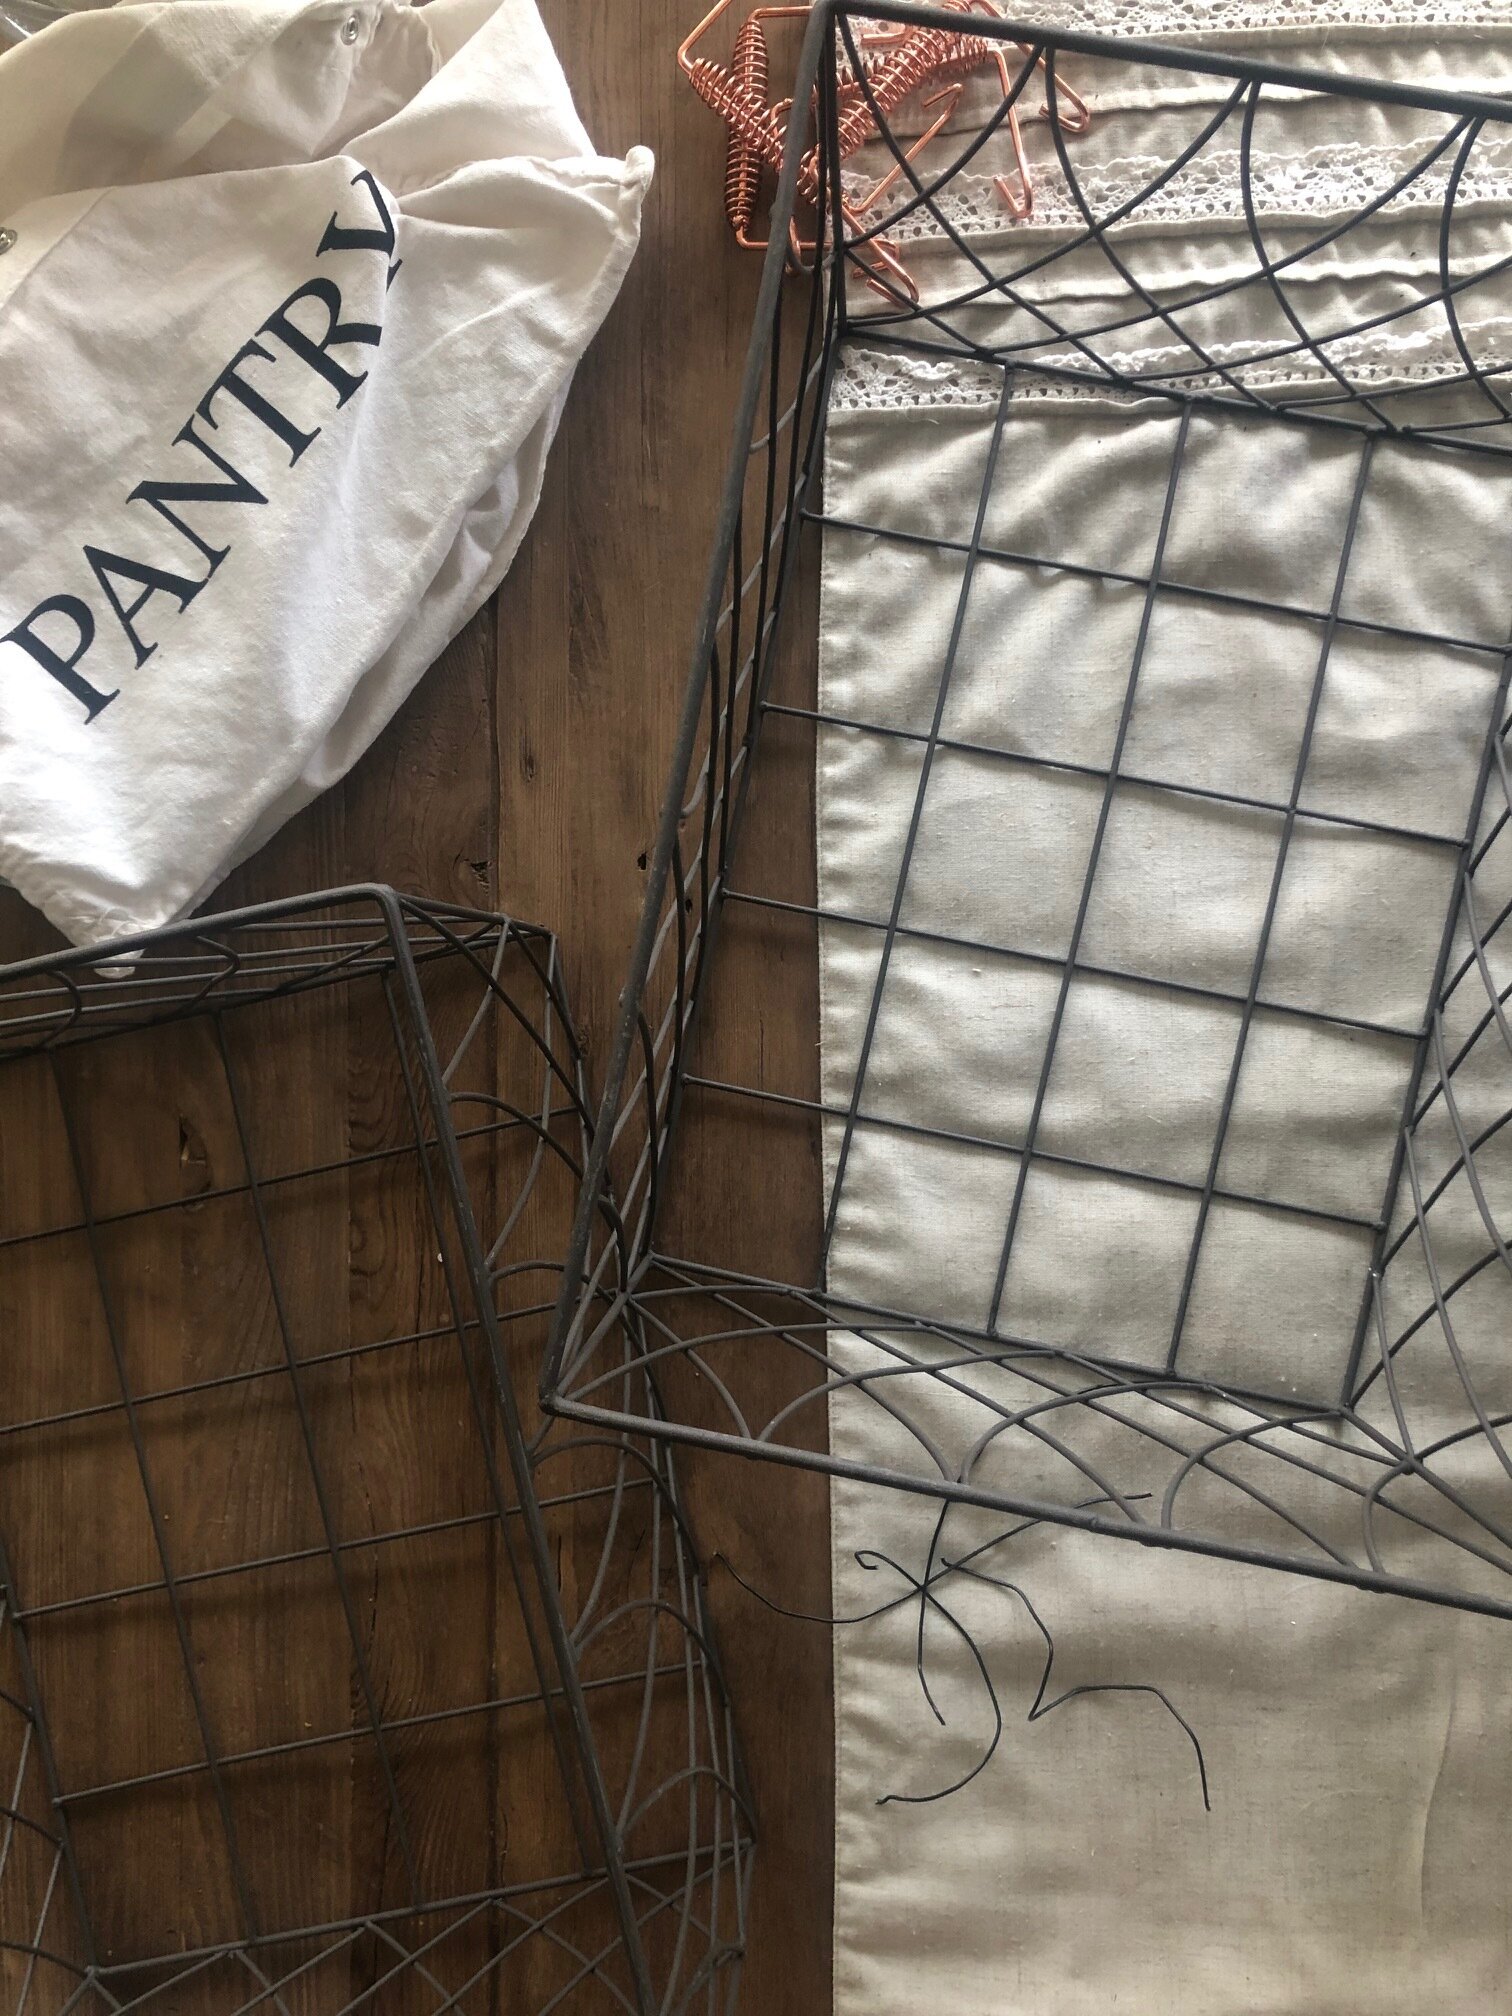
Once home, I stripped them of their {totally cheesy} liners and laid the baskets in pairs end to end. With gloved hands for safety, I cut lengths heavy gauge wire to secure each pair together by binding them at each of the four adjoining corners. They were incredibly stable and square. What I should have done, but didn’t until a year later, was to spray the assembled bins with an outdoor protective coating or a paint to protect from rust. Oddly enough, after a year the bins haven’t rusted but the wire I used to adjoin them did.
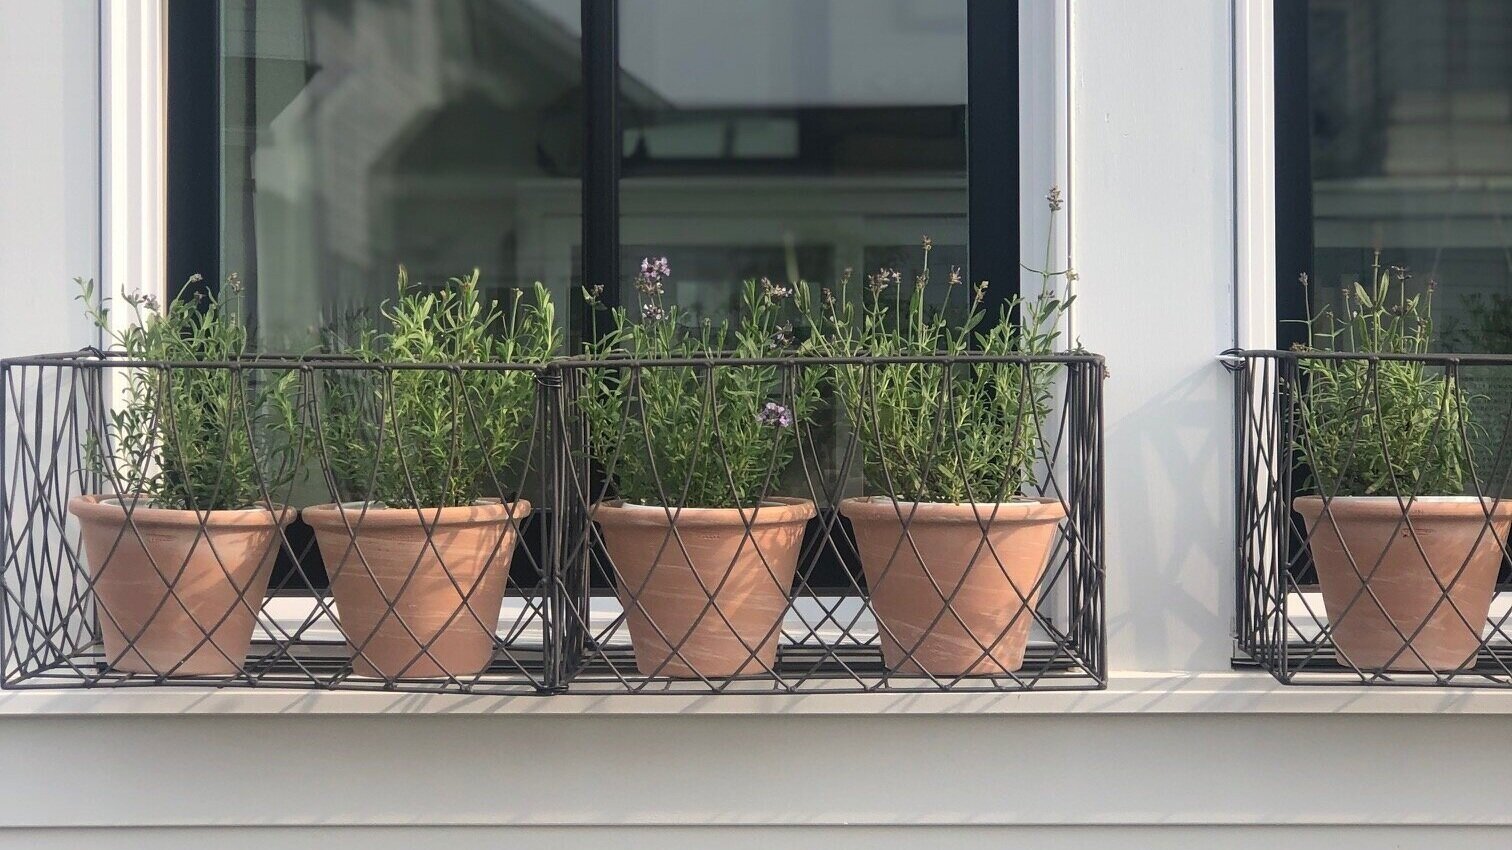
All that was left was how to hang them on the windows. In their finished state, the boxes spanned just to the outside of each window. Because of the open lattice work style of the baskets, we decided to use cup hooks from the hardware store to literally ‘hang’ the boxes. Cup hooks are those “C” shaped hooks with a straight threaded end that are intended for the inside of kitchen cabinets, So named because when screwed into the underside of a shelf, they can suspend cups and mugs by their handles. They are pennies a piece and come in various sizes and finishes. We chose white hooks to blend with our house color, but I imagine they could easily be spray painted to match any finish. Again, we should have protected the hooks with a rust inhibiting spray, live & learn.
After measuring carefully to make certain the hooks would be both level and land in a place where they could be fed through the open lattice work of the baskets, we drilled pilot holes into the window frames and placed one hook on either side of the windows to support each window box. Once the boxes were all placed, it was a matter of deciding how to fill them. This project is great for near instant gratification. Shopping out the supplies took exponentially more time than assembling and installing the boxes.
We chose to place small pots of lavender in our boxes initially, which was really pretty and uniform. Until they died, I’m bad at lavender. This year we opted for a mix of annuals and small boxwoods. I’m better at these. Watering is easy, and with the open wirework bottom of the bins, drainage is not an issue. At the end of the season when the plants fade, clean up is super easy. We remove the pots and the bins, and store them in the garage. Because the bins hang from the cup hooks, they just lift right off when the time comes, and can go right back in place the next year. And because the bins are open latticework, they haven’t stained or damaged the siding of the house beneath.
If you like the more formal look of the iron boxes, this is a great DIY. I don’t know if the At Home store still sells the style of baskets we used, but I do know there are a ton of similar options out there. So long as they are sturdy enough and squared, and they can be sized to straddle your window, they should work. As mentioned earlier, I think a protectant spray is a good idea to minimize any rust tendencies.
If you give this DIY a try, send me a photo, I’d love to see!
All images copyright 2015-2023 The Linen Rabbit. All rights reserved.